

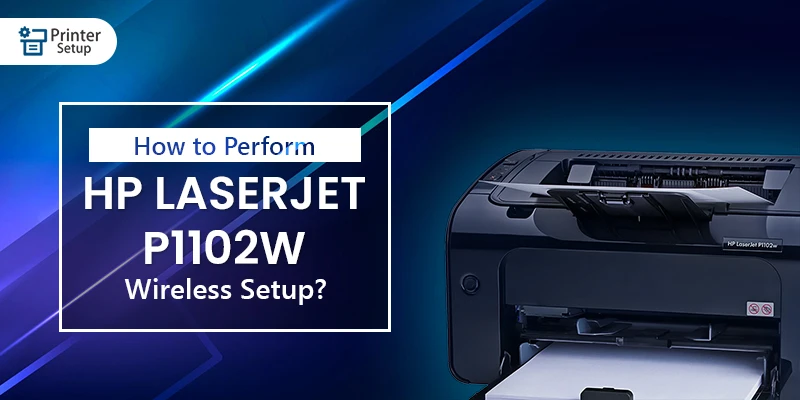
The reliable HP LaserJet Pro P1102W wireless setup provides excellent efficiency and easy wireless printing. This is ideal for a small office thanks to convenient features like HP Auto-On/Auto-Off function and Instant-On technology. The printer is also inexpensive. Print content with astounding detail, and use the fast 18ppm print rate to do the job swiftly.
You won’t require any cords. Simply remove the printer, turn on the Wi-Fi, link your smartphone or tablet, and press a button to start printing. Thanks to such slick features, your productivity will increase, and you’ll be liberated from cumbersome wires. However, you can use the USB cable that is included to connect it to your PC if you prefer a connected connection.
Thus, you need to set up the printer to use all these features. In this article, you can review all the vital steps for the HP LaserJet Pro P1102W wireless setup.
Steps for HP Laserjet P1102W Wireless Setup Assembly
In this article, you can go through the complete procedure of assembling the product components before installing the software on the computer for the HP Laserjet P1102W wireless setup.
- Firstly, remove the printer from the box and check for all the items.
- Ensure to remove all the packaging tapes from the HP printer.
- Lift the door of the print cartridge to open it.
- Pull out all the packaging from the cartridge, then remove the print cartridge.
- Ensure to hold the print cartridge from each end to prevent harm.
- Extract out the packaging from inside the printer.
- From the print cartridge, remove the orange clip from the end.
- To properly spread the toner, gently rock the print cartridge from side to side.
- Pull out the tab to remove the sealing tape from the print cartridge by bending the print cartridge tab on the left side until the tab comes loose.
- Close the door after inserting the print cartridge.
- For loading the paper in the input tray, glide out the paper width and length guide to the farthest points.
- Insert the paper into the input tray with the print side up and top forward.
- The paper guides must be slid inward to rest against the paper stack.
- Now, connect the power cable to the back of your printer and plug it into the power outlet.
- Lastly, turn ON the printer. The printer might print a blank page when turned ON for the first time.
How to Download Software and Drivers in HP Laserjet P1102W?
After hardware setup, follow some effortless steps to download the software and drivers in the HP Laserjet P1102W wireless setup.
- Firstly, you can install the full software from the CD in the box that came with your new printer.
- Or you can download it from the HP official website. The link for downloading is https://support.hp.com/us-en/drivers/selfservice/hp-laserjet-pro-p1102-printer-series/4110394/model/4110306
- Click on download.
- Once it is downloaded, locate the file in your window. The file might be present in the download section.
- Double-click the file to install the software.
- After installing, restart the computer.
How to set up the Printer over a Wireless Network?
You can easily make the HP Laserjet P1120W wireless setup. Install the print driver on a Mac or Windows computer to connect your printer wirelessly. Thus, you must follow the steps for setting up depending on your system type.
Connect the printer to your computer with a wireless network.
In Windows
You can utilize a temporary USB connection to connect your printer to the wireless network. Wait until the installation program prompts you before connecting the USB cord. The following steps:
- Obtain the name and password of the network.
- Ensure to use a USB cord that comes with your printer. A USB cord is necessary to configure your printer on a wireless network.
- Visit this link https://support.hp.com/us-en/drivers/printers
- Choose the device as a printer, type in the printer name, and tap on Submit.
- Download the full software to install and configure the printer on a wireless network and follow the on-screen instructions.
- Lastly, restart your Windows device when asked to complete the installation.
In Mac
Get over this instruction for connecting the printer to your Mac with a wireless network.
- Start by obtaining the network name and pass-phrase. If you face any difficulty with the same, find help for your Wireless WEP, WPA, or WPA2 Password at the HP support page.
- Now connect one end of the USB cable to the rear of the printer and the other to the computer.
- You must ensure printer firmware is up to date.
- Now, go to software and driver downloads on the HP Support page. Or click this link https://support.hp.com/us-en/drivers
- Select the device as a Printer.
- Type your printer name and press enter.
- After that, tap on the Apple menu and then tap on System Preferences.
- Print & Fax, Print & Scan, or Printers & Scanners, based on your operating system version.
- Now, tap on your printer’s name and then on Options & Supplies.
- Proceed by clicking Utility. After that, select Open Printer Utility.
- Open the advanced printer settings window by clickingHTML Config.
- Click on the networking tab and click Wireless in the left plane.
- After clicking wireless, click 802.11b/g/n Wireless, and then select “Enabled” from the pop-up menu.
- Now, double-click the network name so that it is added to the Current Network Name field ( SSID )
- Add network-pas phrase and click Apply.
- Proceed by disconnecting the USB cable from the printer and computer.
- Click the name of printers in the Printers & Scanners, Print & Scan, or Print & Fax windows. Now click on the minus sign and delete the USB Installed Printer.
- After deleting the USB-installed printer, click on the Plus sign. Click Add Printer or Scanner.
- Click the name of your printer with Bonjour as the kind. Then click the Use or Print Using box, and then select your printer’s name in the pop-up menu.
- Now Click Add to add the printer to the list.
By this, you are good to go with Wireless Printing.
HP Printer Setup with HP Smart App
The critical piece of software for your HP Laserjet P1102W wireless setup is the HP Smart app. After installing this app, you can configure the printer connection on the device you wish to print from. The HP Smart app installs all essential drivers for printing and scanning.
- Install the HP Smart app for Android, Windows, Apple iOS, iPads, and macOS.
- Download the HP smart app link:
- Android or Apple iOS: https://123.hp.com/us/en/
- Windows: https://apps.microsoft.com/store/detail/hp-smart/9WZDNCRFHWLH?hl=en-us&g
- macOS : https://apps.apple.com/us/app/hp-smart/id1474276998
- If installing for the first time, then sign in to the account.
- Prepare the printer for setup if you’re setting it up on a Wi-Fi network.
- Ensure to place the printer and computer near the Wi-Fi router.
- Connect the WiFi network to your computer. Ensure only to use a WiFi connection during setup. If the device is connected to an Ethernet Cable, then disconnect it.
- To identify the printer during the HP Smart app setup, turn ON the Bluetooth.
- Make sure to update your Windows computer.
- Once HP Smart for iOS and Android has been installed, Turn ON the device location so the printer can easily detect the device.
- Select the correct printer if you see multiple devices during the setup. Do not choose the printer with the word “DIRECT” in its name since it is just for Wi-Fi Direct connections.
- Lauch the HP Smart App
- When launched for the first time, the HP smart app will try to find and set up the printer.
- If not, launch for the first time, then click on the Add printer symbol or on the Plus sign to add the printer.
- Choose Wi-Fi, USB, or Network from the connection type drop-down menu. Depending on your computer or mobile device, different options are offered. To finish the setup, adhere to the procedures.
- Continue these procedures if the printer is not found even when connected to WiFi.
- To make the connection, restore the WiFi setup mode.
- Choose Network Setup or Settings from the Wireless or Setup menu for the printer with a touchscreen display or menu, then click Restore Network settings.
- For the printer without a touchscreen display or menu, tap to open the wireless or setup, choose Network Setup or Settings, and click on Restore Network settings.
- Now close and reopen the HP smart app within two, and try again by following these steps for again connecting the printer
How to use HP Smart App for Printing, Scanning & Copying?
By installing the HP smart app, you not only install the software and drivers, but also this app helps you print, scan, and copy any document, file, or image. It can also give signals related to troubleshooting issues, printer set preferences, printer status, and order supplies.
This app is all-in-one for all your HP Laserjet P1102W wireless setup. To understand how to use this app for all purposes, adhere to the instructions.
- To print, choose the item you want to print, choose a print job type from the home screen if required, utilize the photo editing tools, and then adjust any print job parameters.
- If you want to scan the document, then directly put the document on the printer scanner glass. You can also use the connected device to import the photo or document to the printer for scanning. Once scanning is complete, you can save the file and share it conveniently.
- For copying in Android & iOS, tap to open the Copy tile, capture a document or image with the camera, choose the size and quantity of copies, and then print the document.
- You can also modify and check the printer status, preferences, parameters, and more just by clicking on the printer image on the home screen.
- Choose Personalised Tiles at the bottom of the screen (Android, iOS) or App Settings (Windows, Mac) to add or remove home screen tiles.
- You can also use the HP smart app for diagnosing and fixing the troubleshooting problem only by running the troubleshooting tools in the app.
- You can use print anywhere with the help of the app and the cellular WiFi network.
- Create shortcuts in the app for quickly completing repetitive tasks.
- Send the items safely to a fax machine or any fax-capable printer.
Setting up the Printer with a USB Connection
Download the HP Smart application for Windows to set up a USB connection and then adhere to the setup instructions.
- If a USB cable is connected to the computer, then remove it from the computer and printer.
- To remove the printer from the device, navigate to Printers & Scanners on your computer and choose the printer’s name from the list. Tap on Remove device and reboot your device.
- Connect your computer to the USB port. Never attach it to a USB hub or docking station.
- Download the HP Smart app from the Microsoft Store on your Windows device.
- If the setup doesn’t start independently, add your printer by clicking the Add symbol.
- Lastly, follow the on-screen instructions for doing the complete setup.
Frequently Asked Questions (FAQs)
What is Auto-On/Auto-Off technology in the HP Laserjet P1102W wireless setup?
This Auto-On/Auto-Off Technology detects when you are printing and turns on and off as necessary to conserve electricity. Additionally, you save more paper because its HP Smart Print capability prints web pages without cut-off corners or blank pages.
Which devices are capable of setting up the USB connection with the printer?
The devices capable of setting up the USB connection in your HP Laserjet P1102W are Windows, MacOS, Chromebook, Android devices, etc.
Which devices are compatible with the HP Laserjet P1102w Wireless setup?
The devices that are compatible with the HP Laserjet printer are:
Mac: Mac OS X v10.5, v10.6, v10.7
Windows: Windows 10, Windows Vista, Windows Server 2008, Windows Server 2003
How do I connect my HP Laserjet P1102w printer with WiFi?
On your device, tap on Networking Menu in the left pane and then select Wireless. From the pop-up menu, choose 802.11b/g/n Wireless, and then choose Enabled. Double-click on the network name to add it to the Current Network name field and tap on Apply.
Read More: